This guide explains how to connect your Star Micronics network receipt printer and cash drawer to the Tabology EPOS.
When connected you will be able to confirm that everything is working and printing correctly.
The printer’s full model number is Star Micronics TSP143IIILAN.
Before you begin
You will need:
Your Network receipt printer
The supplied power cable
An Ethernet cable
An 80 mm thermal paper roll
A compatible cash drawer and cash-drawer cable
An available Ethernet port on your router or network switch
An iPad with Tabology EPOS installed
The printer connects to your network using an Ethernet cable. Your iPad connects using Wi-Fi. Both devices must be connected to the same local network.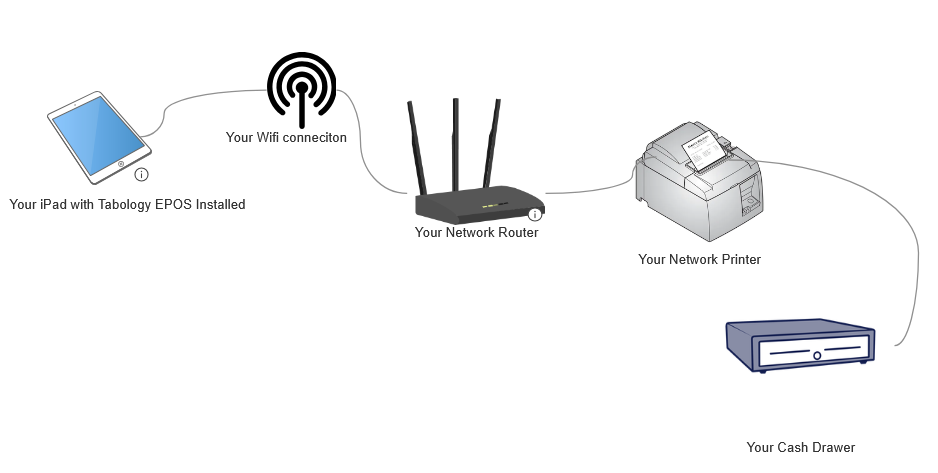
1. Connect the printer and cash drawer
Make sure the printer is switched off before connecting any cables.
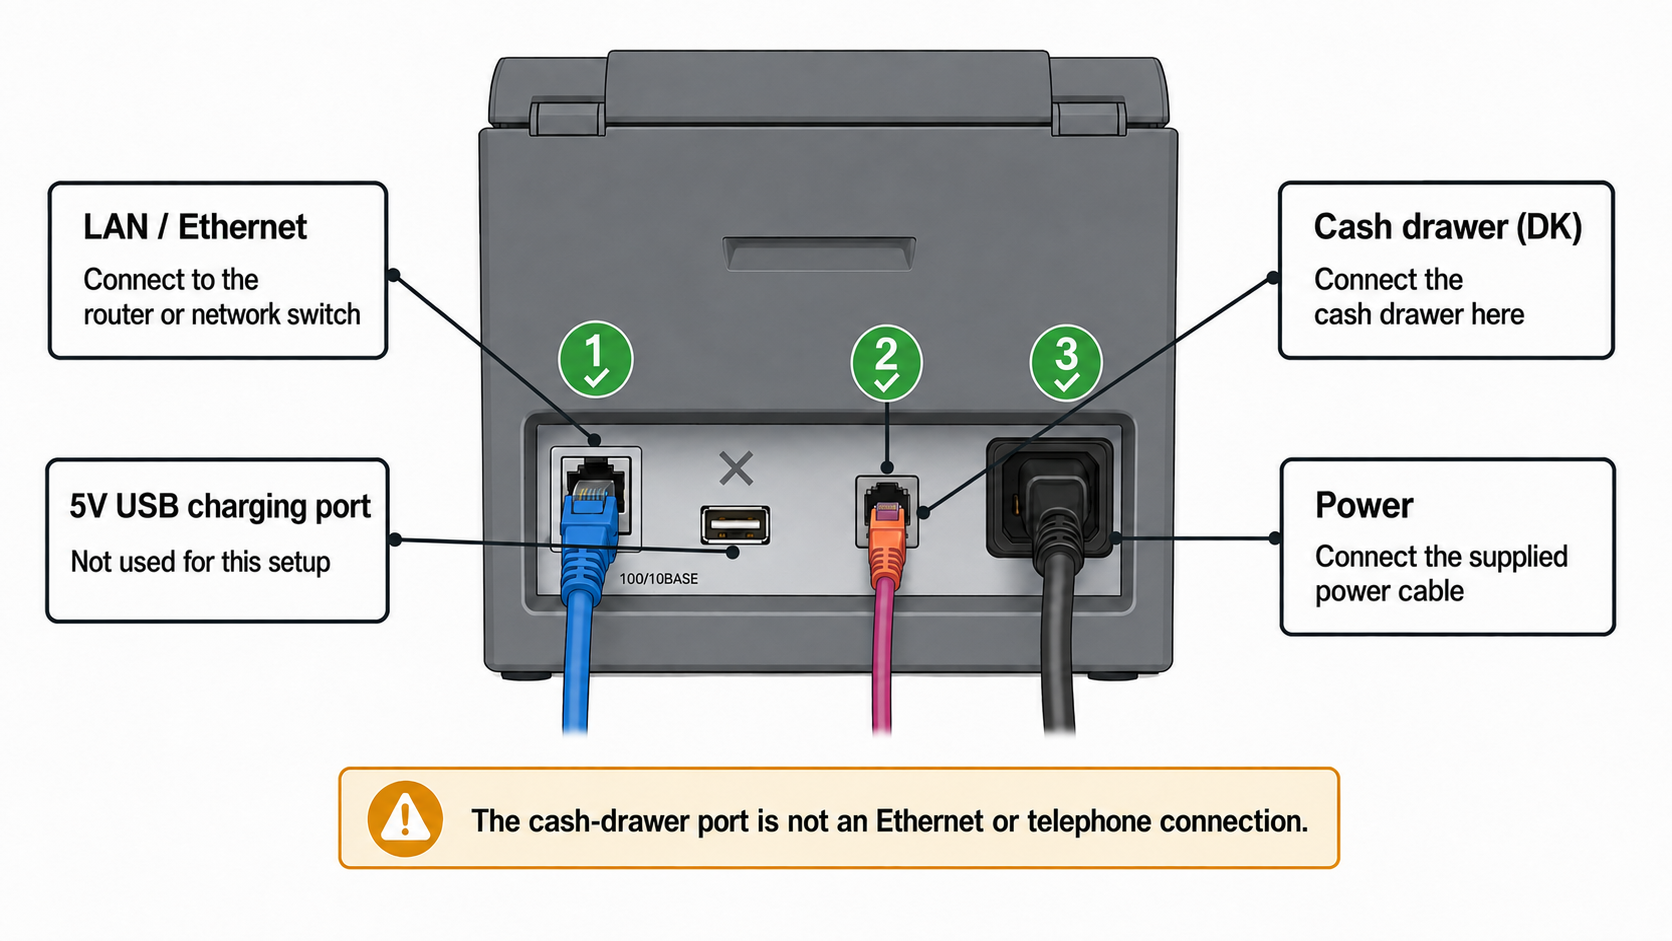
Connect the cables to the back of the printer:
Connect the Ethernet cable to the printer’s LAN port.
Connect the other end of the Ethernet cable to your router or network switch.
Connect the cash-drawer cable to the printer’s DK cash-drawer port.
Connect the supplied power cable to the printer.
Note: The printer also has a 5V USB charging port. This isn't used to connect the printer to Tabology EPOS.
Important: The cash-drawer port may look similar to a network or telephone socket. Only connect the cash-drawer cable to the port marked DK.
2. Load the thermal paper
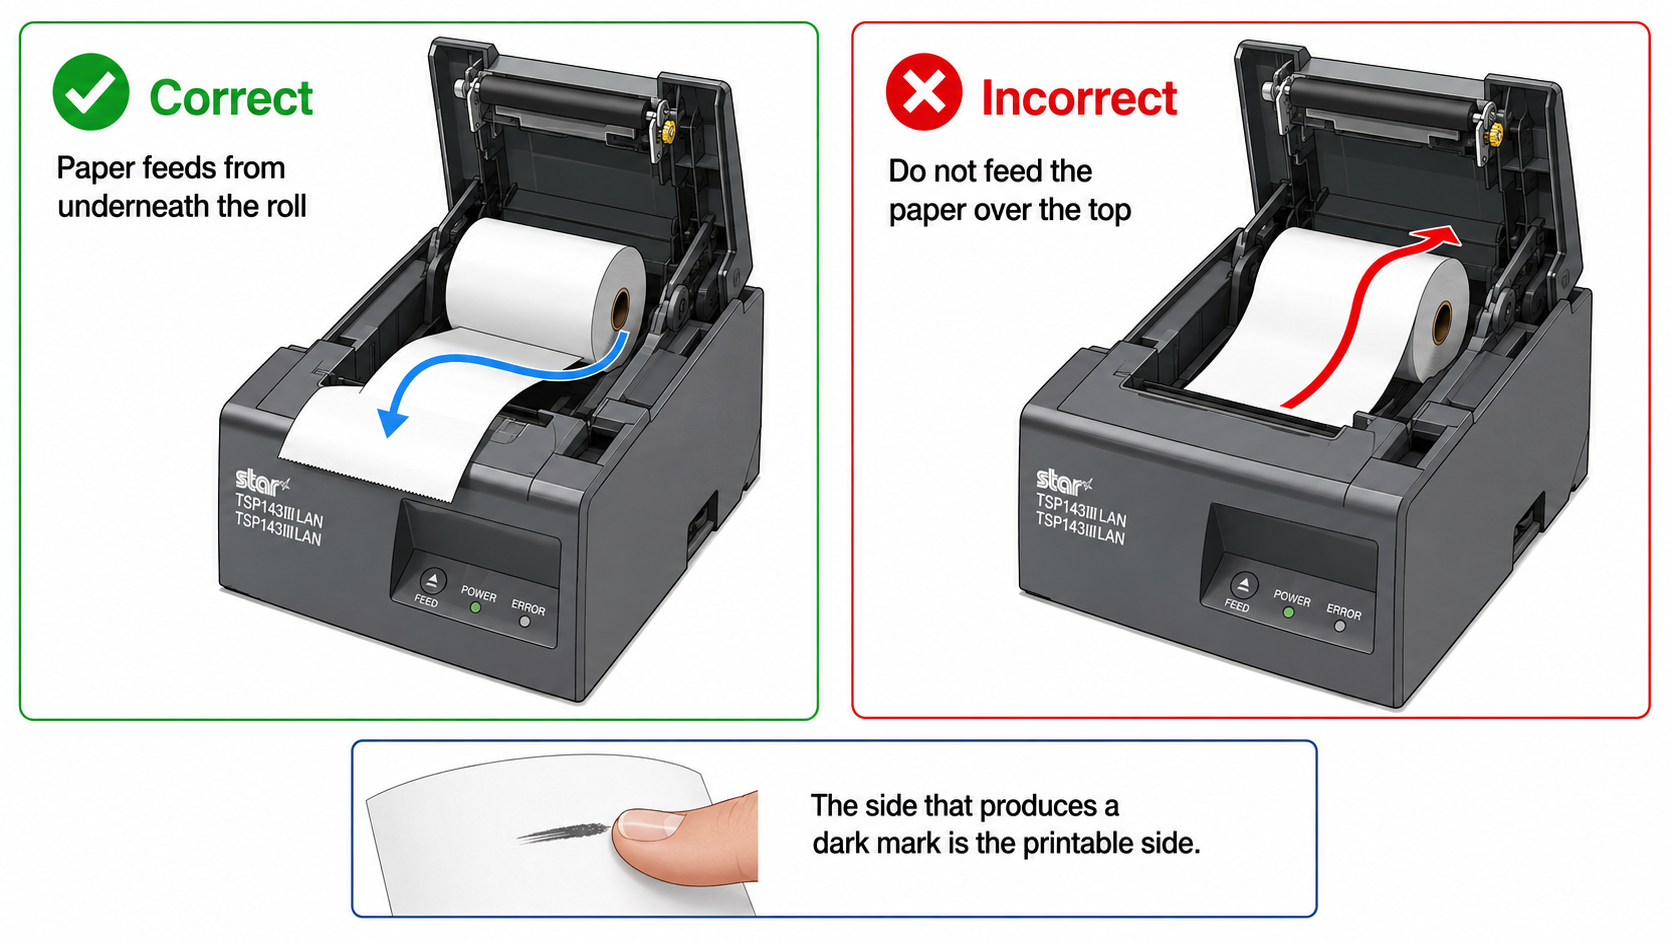
- Pull the cover-release lever and open the printer cover
- Place an 80mm thermal paper roll inside the printer. The paper should feed from underneath the roll and towards the front of the printer
- Leave a short length of paper extending beyond the cutter, then close the cover firmly
Note: If you are unsure which side of the paper is printable, lightly scratch both sides with a fingernail. The heat-sensitive side will produce a dark-grey mark - this is the printable side
3. Switch on the printer
- Switch on the printer using the power switch on its left-hand side. The Blue READY or POWER indicator should illuminate.
- Allow approximately 30 seconds for the printer to connect to your network before continuing.
4. Print the Network information
Printing a network self-test confirms that the printer has connected to your network. It also provides the IP address you will use to identify the printer in Tabology EPOS.
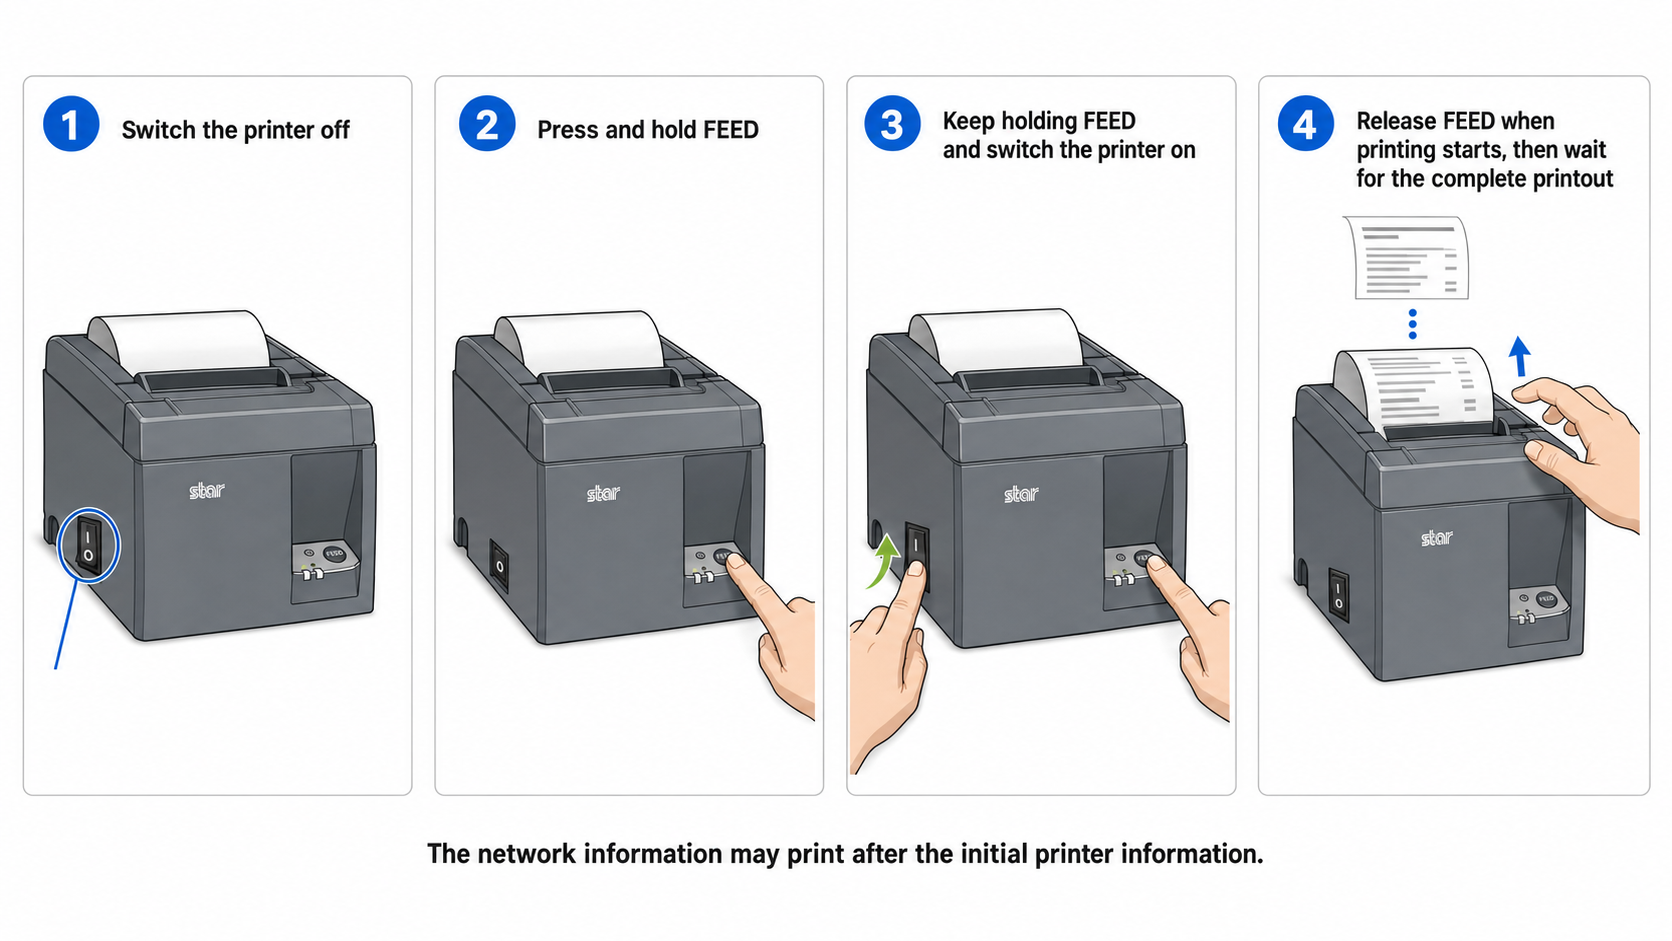
To produce the self-test:
Switch the printer off.
Press and hold the FEED button.
While continuing to hold FEED, switch the printer on.
Release the FEED button when the printer begins printing.
Wait for the complete self-test to finish.
The printer may produce its general printer information first and its network information afterwards. There may be a short pause between the two sections.
5. Find the printer’s IP address
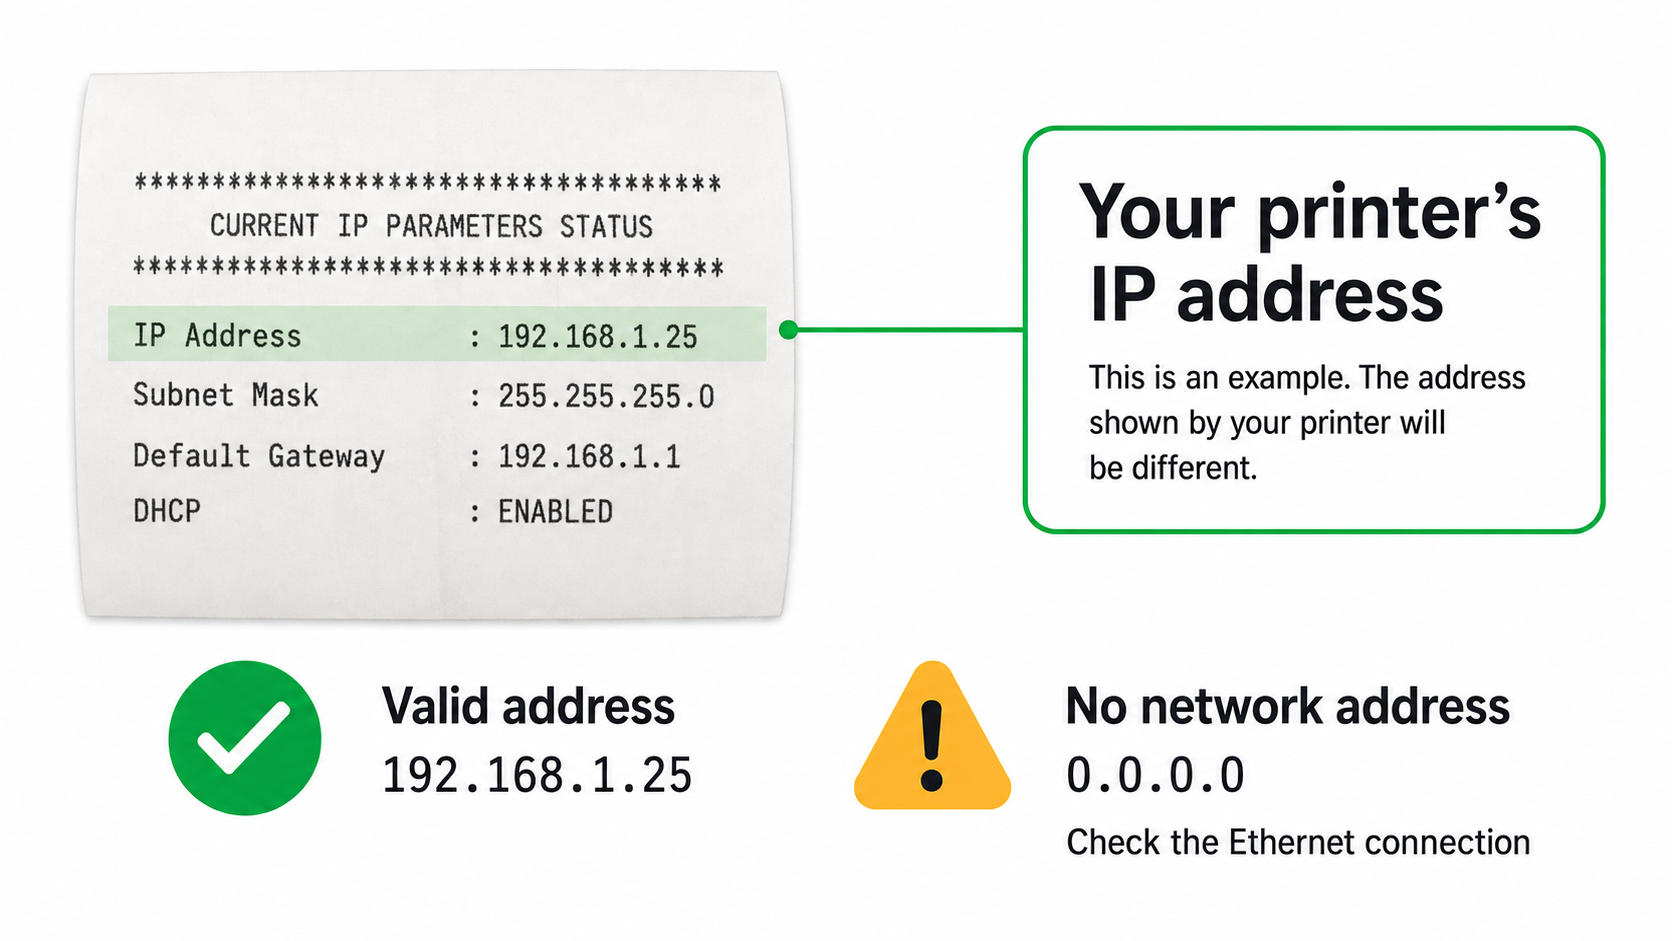
On the network information, locate the section Current IP Parameters Status
Make a note of the IP address shown underneath it.
A working IP address will usually resemble one of these examples:
192.168.1.25192.168.0.4510.0.0.18
Note: The address shown by your printer will be different
If the IP address is blank or displays 0.0.0.0, the printer has not successfully connected to your network. Check the Ethernet cable at both ends before printing another self-test.
6. Check your iPad’s network connection
- Open Settings > Wi-Fi on your iPad
- Confirm that the iPad is connected to the venue’s normal Wi-Fi network
- Avoid using a guest Wi-Fi network. Guest networks often prevent wireless devices from communicating with equipment connected by Ethernet
- The iPad and printer don't need to be connected using the same type of cable or connection. However, they must both be part of the same local network.
7. Allow Tabology EPOS to access the local network
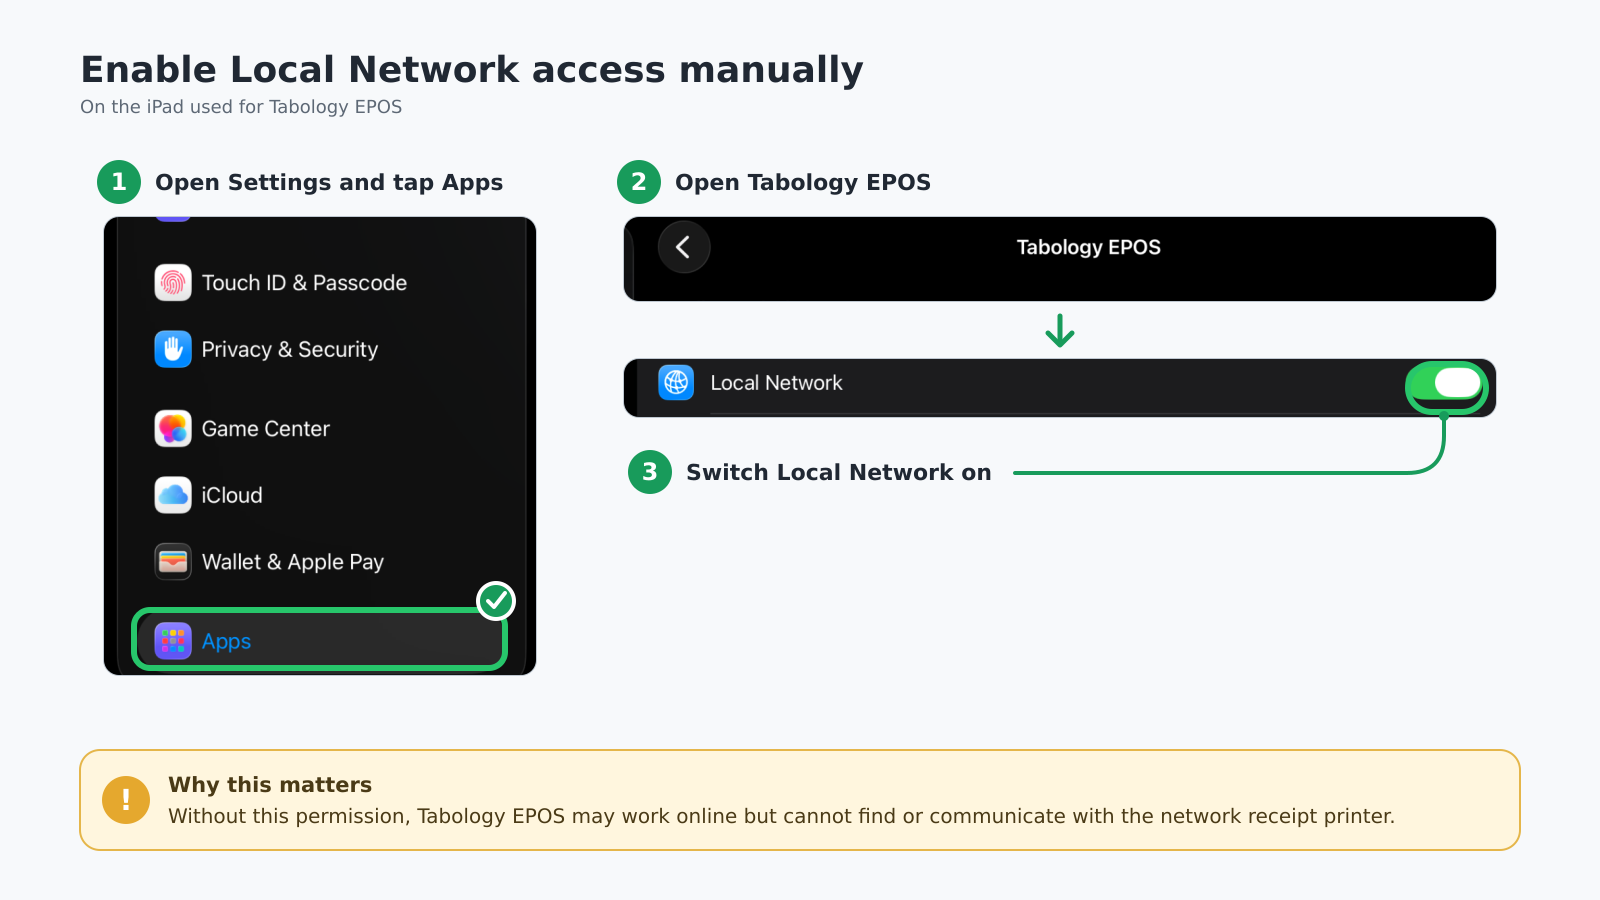
Tabology EPOS needs permission to find and communicate with printers on your local network.
When your iPad displays a message asking whether Tabology EPOS can find and connect to devices on your local network, click Allow.
If access was previously denied:
Open Settings on the iPad.
Select Privacy & Security.
Select Local Network.
Enable access for Tabology EPOS.
On some app versions, Tabology EPOS may appear as Tabology in the iPad’s settings.
Without this permission, Tabology EPOS may continue to work online but will not be able to find or communicate with the network receipt printer.
8. Your Printer is now connected to your network
Your printer is now physically connected and available on your local network.
Follow our Printer management guide to:
- Add the printer to Tabology EPOS
- Give it a clear, friendly name
- Assign the required receipt, food or drink printing jobs
Use the IP address shown on the printer’s network self-test to identify the correct printer.
Troubleshooting
The receipt prints blank
The thermal paper has probably been loaded the wrong way around.
- Open the printer cover, turn the paper roll, and confirm that the paper feeds from beneath the roll.
The cash drawer does not open
Check that:
The cash-drawer cable is connected to the printer’s DK port.
The cable is securely connected at both the printer and cash drawer.
The cash drawer is not locked with its key.
The correct receipt-printing job has been assigned to the printer in Tabology EPOS.
If the printer works but the drawer still does not open, contact Tabology Support.
Was this article helpful?
That’s Great!
Thank you for your feedback
Sorry! We couldn't be helpful
Thank you for your feedback
Feedback sent
We appreciate your effort and will try to fix the article