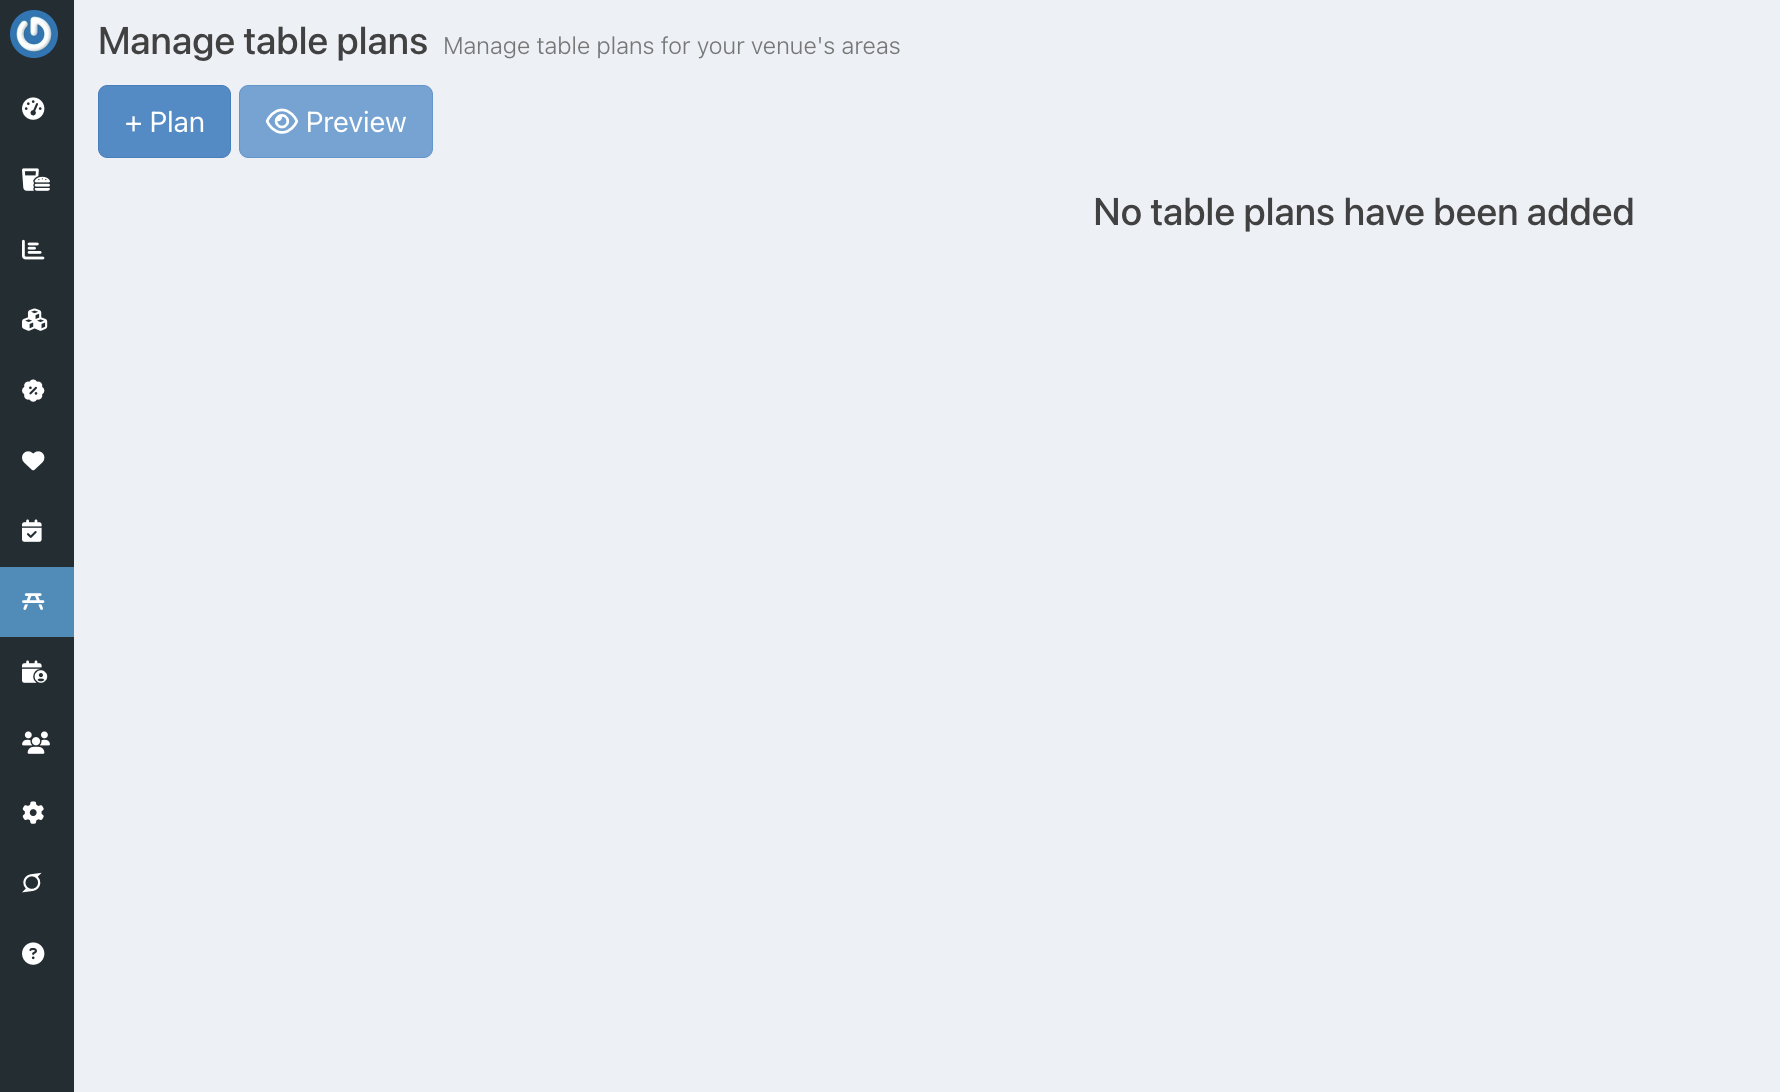
You can create a table plan on the back office that will display on your EPOS devices, making it easier to add orders to tables.

To create a table plan select Tables > Table plan, from the left hand navigation from the back office dashboard.

You can create a table plan for any area that you have set up under Tables & areas.
The first thing you will need to do is add a new table plan by pressing the '+Plan' button in the top left of the screen.
If you have areas set up, this will enable you to select which area you want to create a table plan for. If you don't have areas set up you can select Default area.
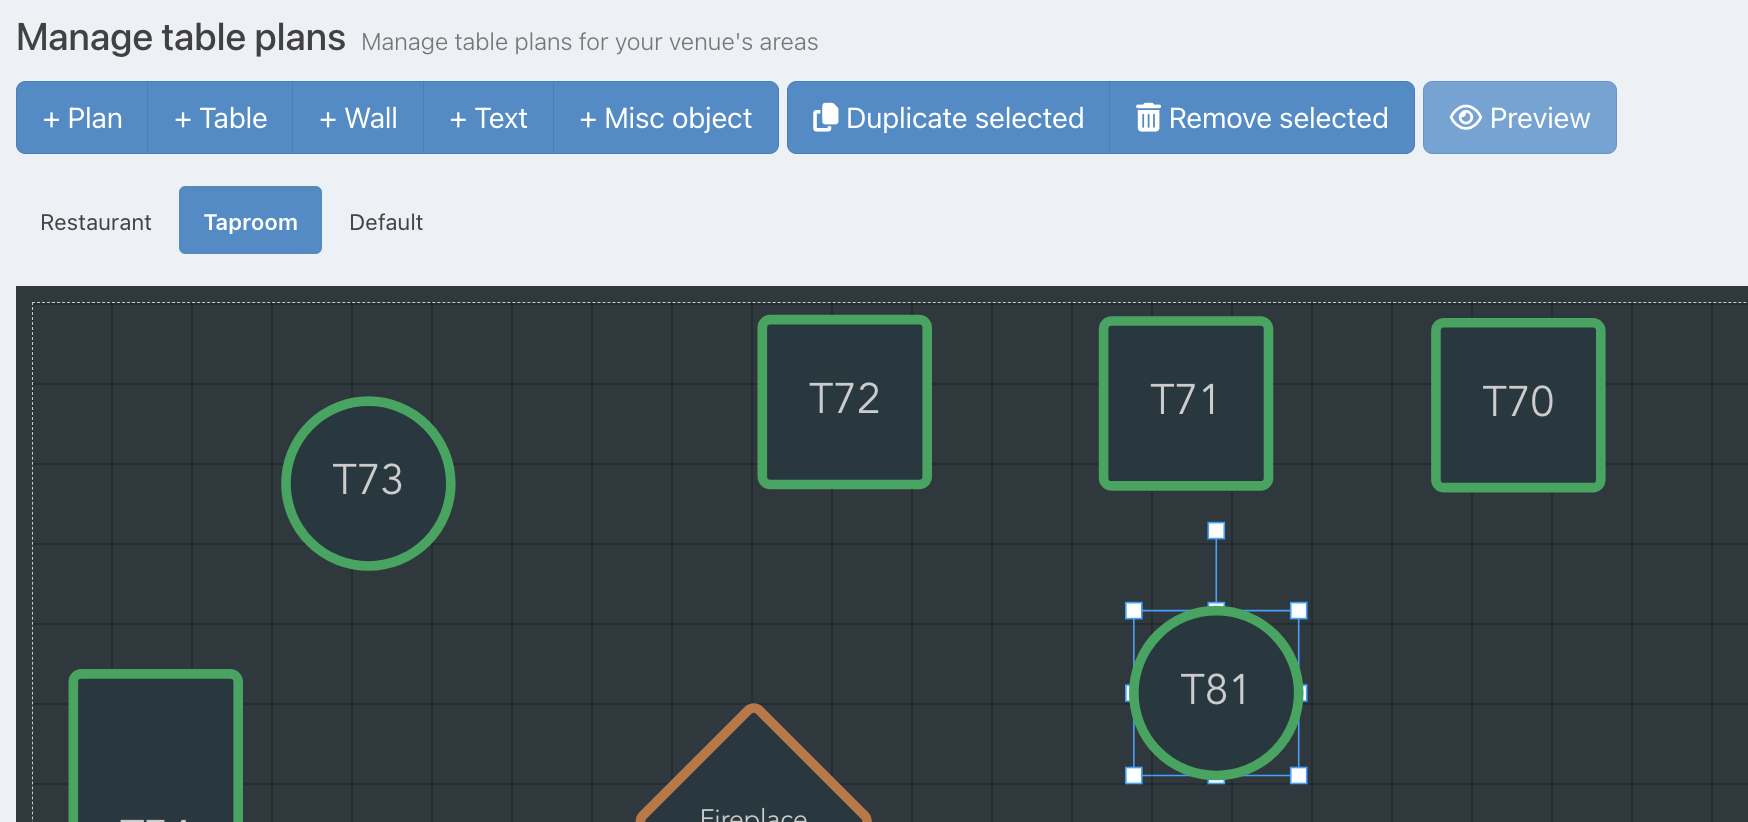
Once you have added a new table plan you can add tables or other features to it.
Note: You can re-order table plans, by dragging & dropping them, before or after one another.
Adding tables
To add a table to your plan click the +Table button.
You can then select the Type (shape) of your table from the dropdown list.
Then select which of your tables you are adding to the plan.
Check you are happy with the Short label that has been generated or edit it if you need to.
Note: This will be the label for the table on the plan, so either just a number, or a letter and a number work well.
Once you are happy with the short label, press + Add.
You will see the table appear on the plan.
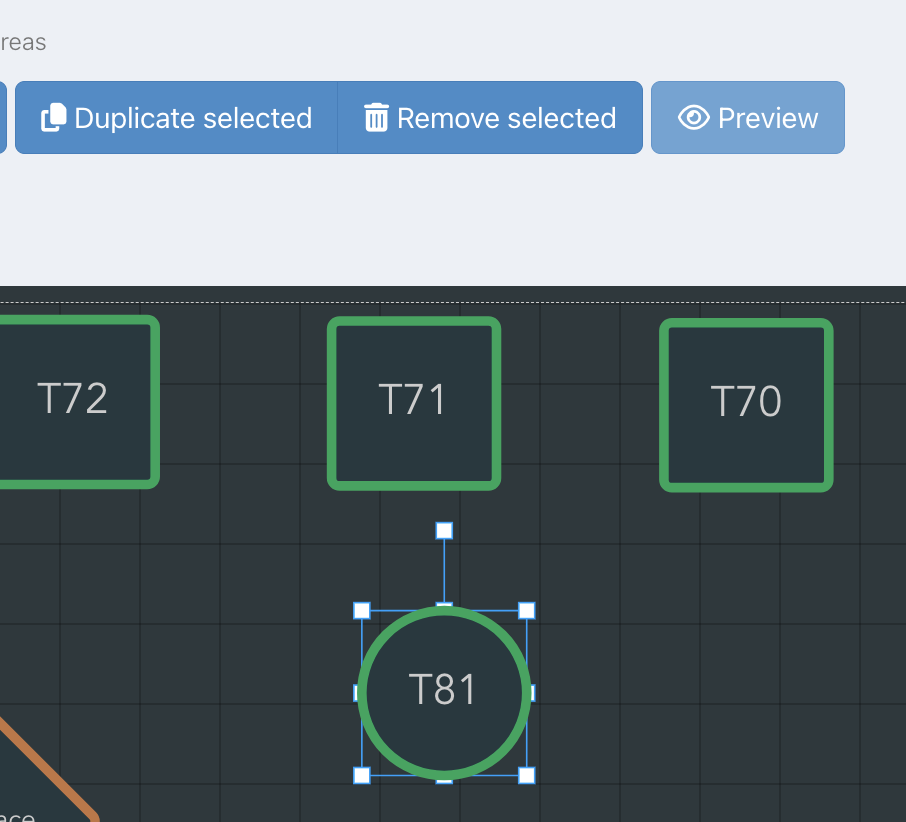
You can move the table by clicking on it and dragging it to the desired location, and resize it by clicking on it, then clicking and dragging any of the marked points.
You can also rotate the table by clicking on it, then clicking and dragging the point above the table.
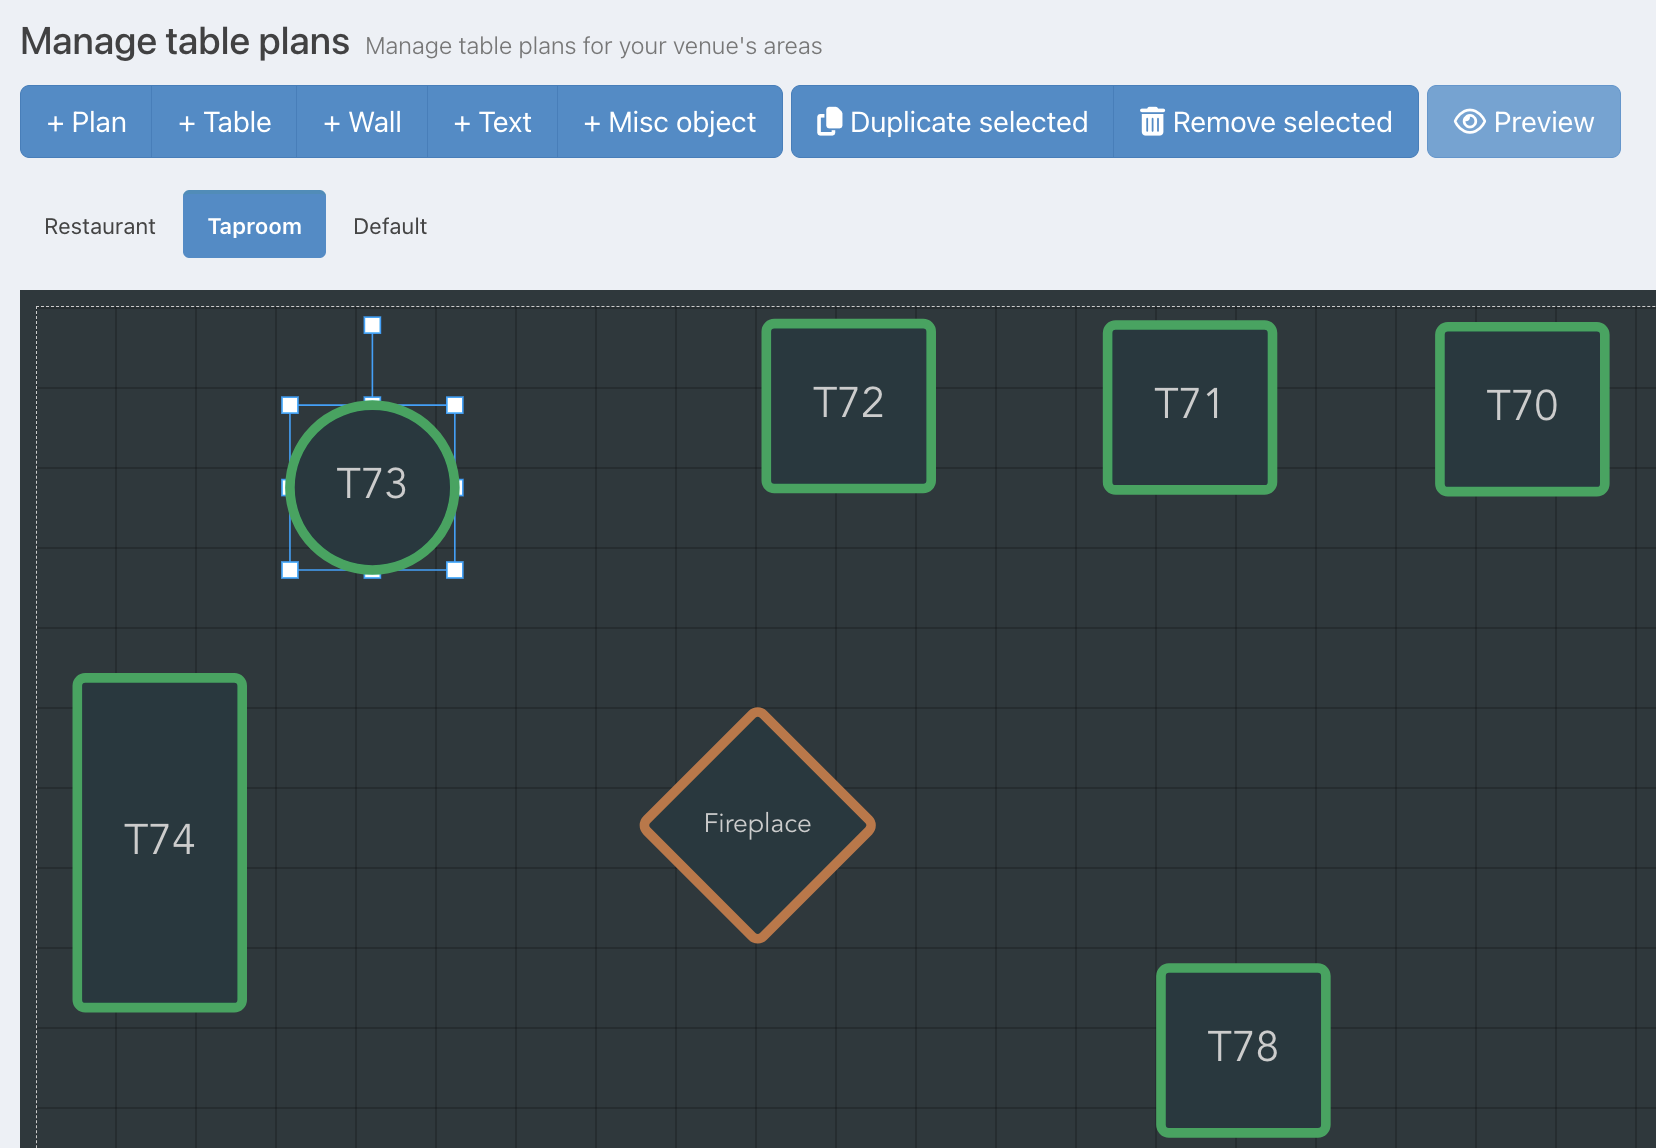
Repeat the above steps to add all of your tables to your plan.
Duplicating a table
To keep your tables of a uniform size and colour, you can duplicate a table by clicking on the table and then clicking the Duplicate selected button at the top of the screen.
Note: You can also duplicate by using the Copy and Paste functions on your keyboard.
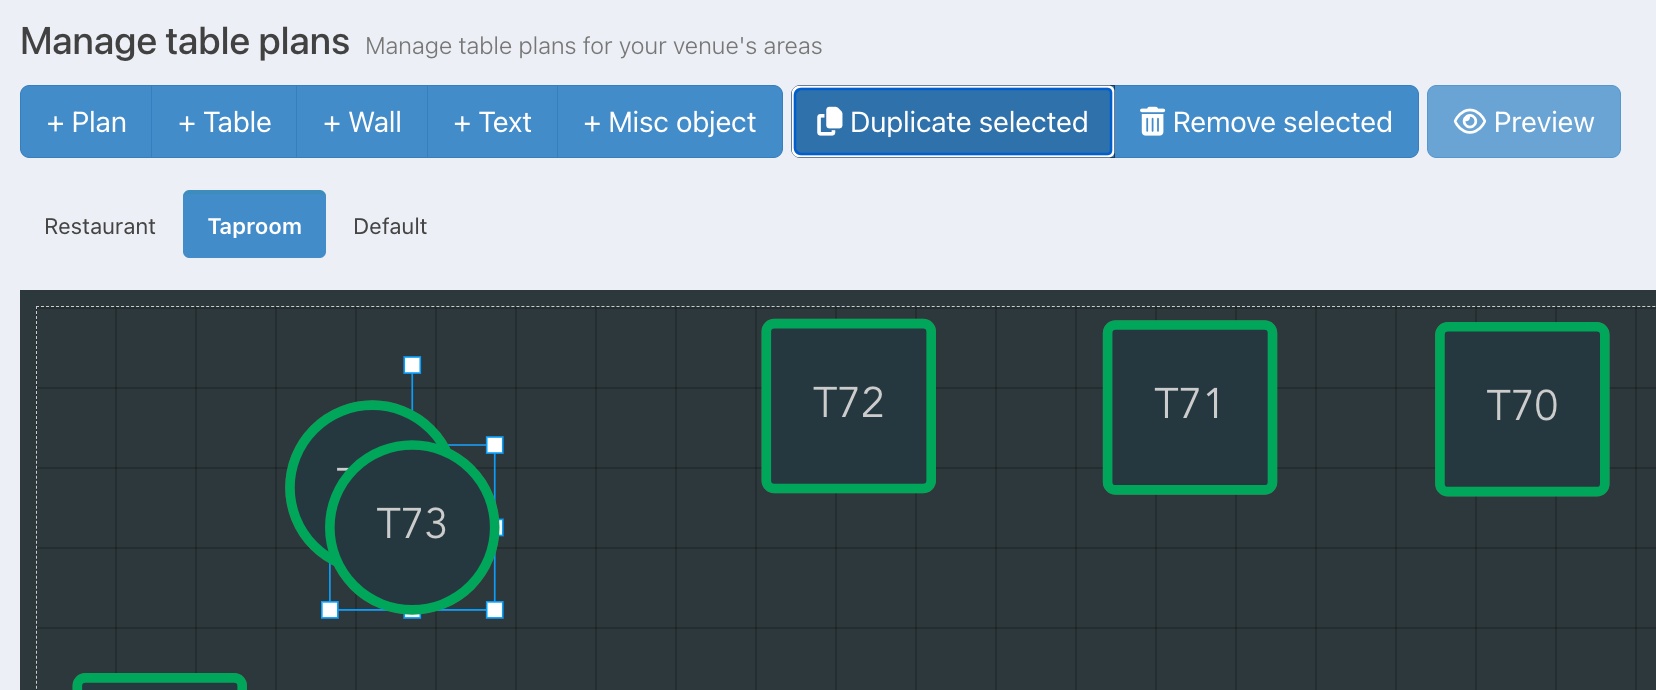
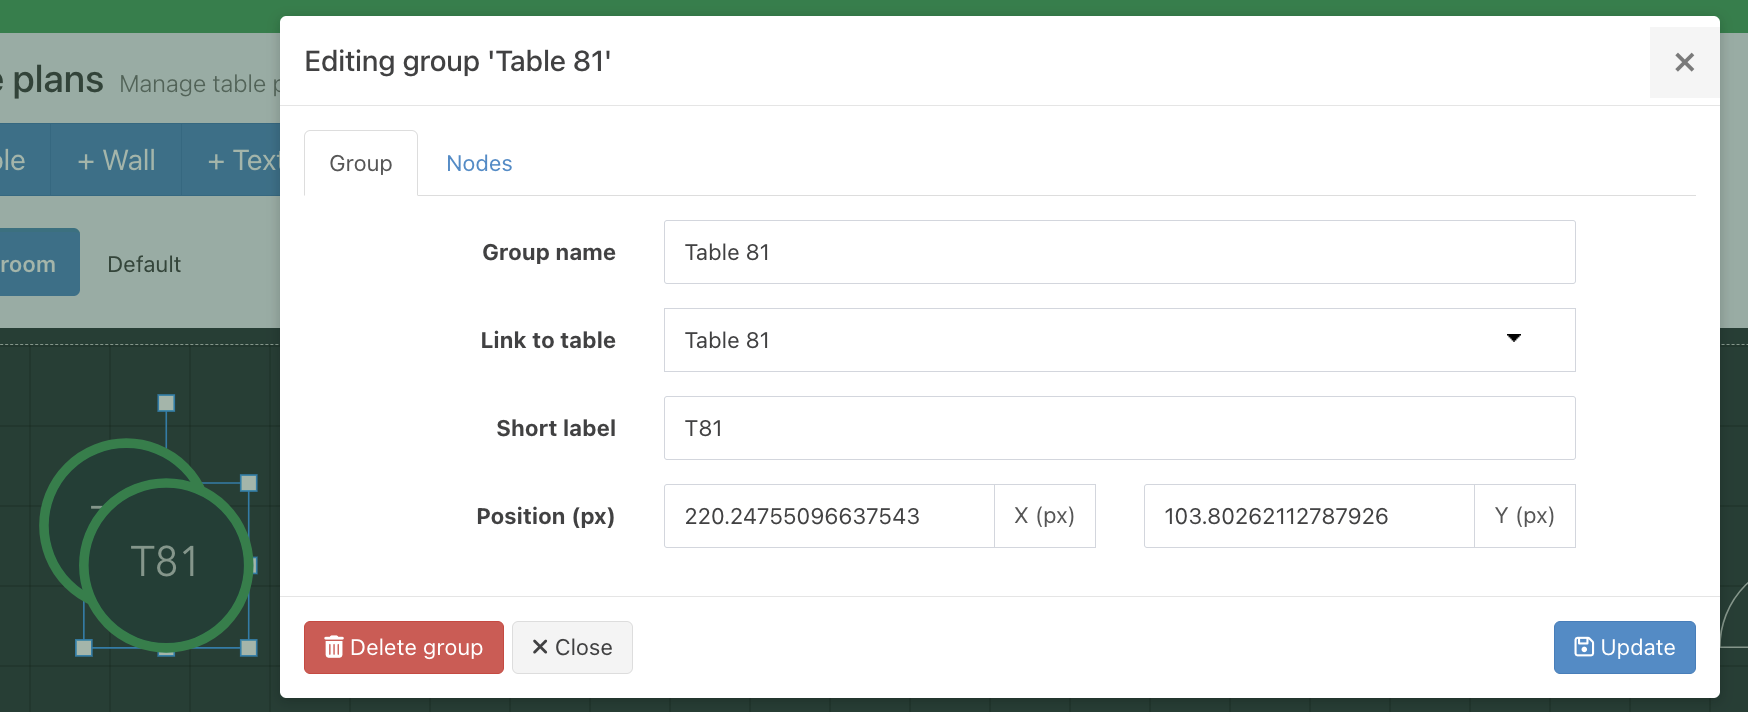
When duplicated, the new table will be selected and will display over the duplicated table. At this point, you may want to edit your table by Double clicking the table and changing the Group name and the Table link. The table name will update in the background, then click the blue Update button.
Drag your table into position as above.
Removing a table
If you need to remove a table, you can click on the table followed by the Remove selected button at the top of the screen.
Note: The table can also be removed, by pressing the backspace or delete button on your keyboard
Adding other features
You can add other features to your table plan and move them around or resize them in the same manner.
You can add:
- Walls - to add a wall just click + Wall and drag to the desired position
- Text labels - to add a text label just click + Text, enter the text you want to display, then drag the label to the desired position
- Misc items - to add a misc item click + Miscthen select from the presented list:
- Bar
- Service counter
- Kitchen
- Toilets
- Custom rectangle (free text)
- Custom round (free text)
- Solid rectangle
- Solid round
- Door
- Double doors
- Stairs

Once you have added your table plan, you can view it on your EPOS and use it to add orders to tables, view tabs and pay bills.
Was this article helpful?
That’s Great!
Thank you for your feedback
Sorry! We couldn't be helpful
Thank you for your feedback
Feedback sent
We appreciate your effort and will try to fix the article